Install and activate your eSIM on your iPhone


Select the device which you are going to complete the process on
Learn the process step by step
Choose the installation method you would like to use
Before starting the installation with a QR code, please note the following important points:
- •You need to have the QR code displayed on another screen or device so you can scan it with your phone's camera.
- •Make sure your internet connection is stable during the whole installation process.
- •Keep in mind that the QR code is valid for a single scan only.
- •Do not remove the eSIM from your device, as it cannot be used again once deleted.
Let's begin the setup together
Open your email
Open your email on a different device from the one you will use for installation, and locate the message we sent you containing the QR code.
If you have not received your code, please . .
Scan the QR code
Open the camera on the iPhone where you will install the eSIM and scan the QR code. Alternatively, go to Settings, then Mobile Data, and select Add Data Plan to scan the code from there.
Follow the on-screen steps on your iPhone to complete the installation.
Scanning the QR code will begin the installation process. Follow the guide below for detailed step-by-step setup.
eSIM Installation Guide Using a QR Code

01. Install your eSIM data plan
The installation will begin automatically once you scan the QR code on your iPhone.
Click on Continue
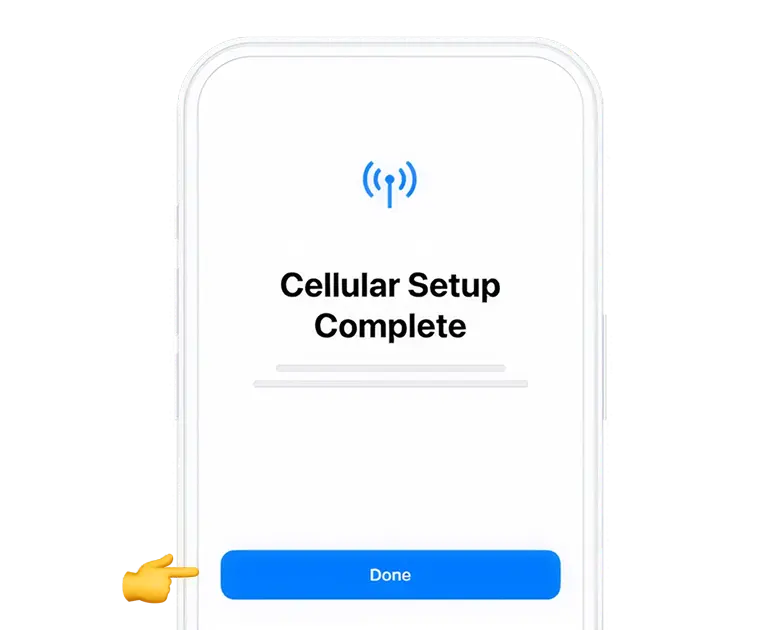
02. Mobile configuration completed
Your data plan has now been successfully installed.
Click on Done

03. Label your data plan
Assign a name to your new Nextline line to help identify it, such as "Nextline Italy."
Click on Continue
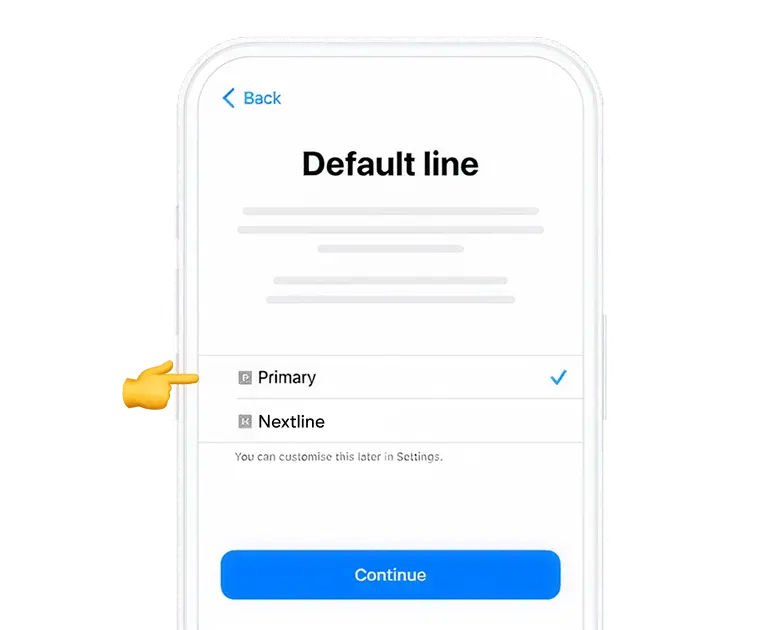
04. Choose your default line
Select the "Primary" option to continue using your number for iMessage and FaceTime services.
Click on Continue
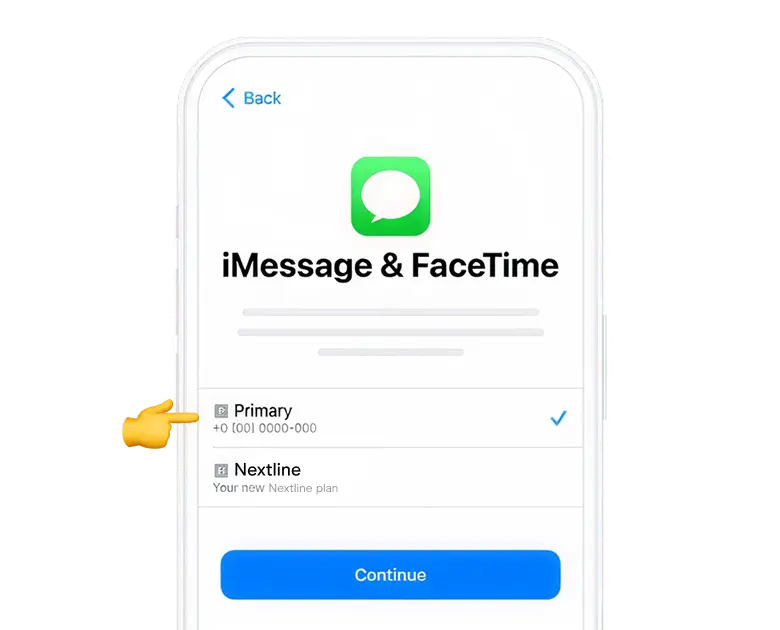
05. iMessage and FaceTime
Select the "Primary" option to continue using your number for iMessage and FaceTime.
Click on Continue
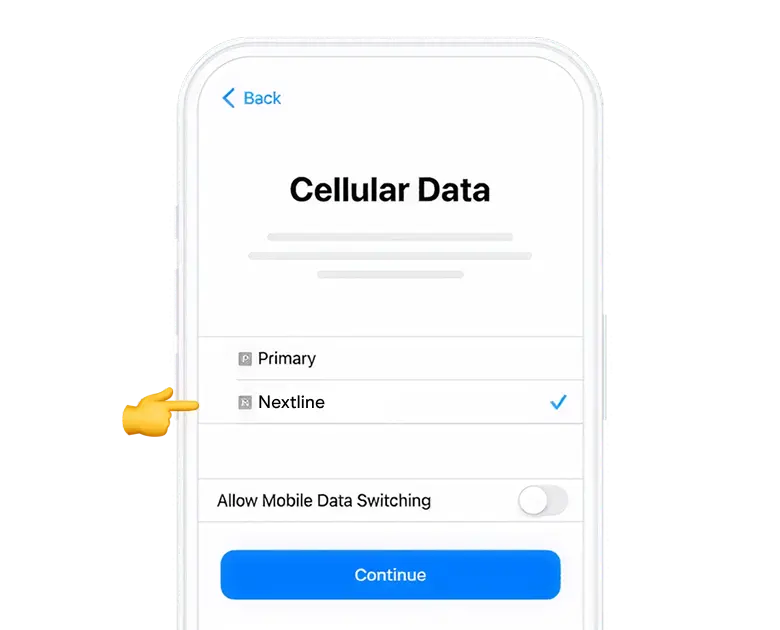
06. Mobile data
Select the "Secondary" option.
Keep "Allow Mobile Data Switching" turned off to prevent extra roaming charges.
Click on Continue
Your iPhone may activate the plan right away. To avoid using data before your trip, turn off roaming on all mobile data plans and enable it once you arrive at your destination.
Congratulations! Your plan has now been installed and is ready to activate.
01
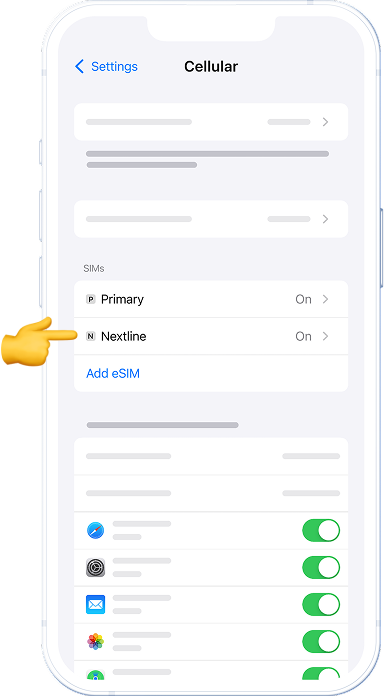
Open "Settings" on your iPhone and select "Mobile Data"

02
Select the Nextline option in the list
03
Scroll down until you find "Data Roaming" and turn it on.

That's it! Your plan is now active and you can start using your data.
How do you know your eSIM is active?
You can check in two ways:
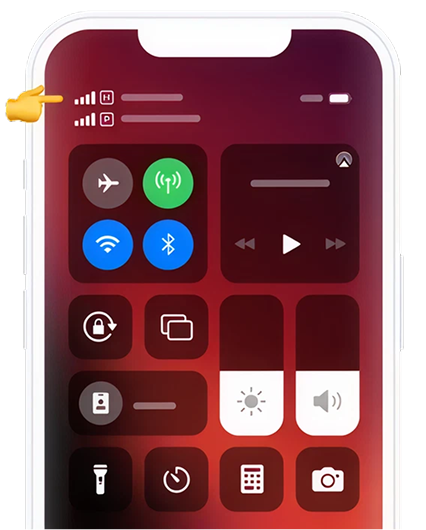
- 1.Make sure there is at least one bar in the signal icon your iPhone.
- 2.Go to "Settings" on your iPhone, select "Mobile Data", click on the "Nextline" option and check that "Data Roaming" is turned on.
How do you know your eSIM is active?
You can check in two ways:
- 1.Make sure there is at least one bar in the signal icon your iPhone.
- 2.Go to "Settings" on your iPhone, select "Mobile Data", click on the "Nextline" option and check that "Data Roaming" is turned on.
Don't worry! We are here for you.
If you have questions during this process, remember we're here to assist you 24/7 through our Online chat.
